Engineering design process

Engineering Design Process Overview
• Iterative process, starting with Steps 1 through 7.
• Identifies potential design issues during testing or building.
• Determines next steps, either revisiting brainstorming and research or using completed research for new ideas.
• Frequently switches between testing and evaluating and making improvements.
• All design processes follow a similar pattern.
• Disassembly and restarting are common when issues arise.
• Successful teams maintain a plan and use notebooks as a tool for success.
• Remains functional parts and repairs problematic ones.
• Consent is required before making significant modifications or breakdowns.
DEFINE
We started by learning about the many components of a robot and how they work together. We completed a little task called "Can you name that part?" Here, we assessed our knowledge of the various components. Following that, we were able to physically inspect and touch the components. My partner and I started creating our robot so that we could test out the four distinct driver control options. We investigated Left Arcade, Right Arcade, Split Arcade, and Tank Drive. The left arcade controls the robot solely with the controller's left joystick. The right arcade controls the robot alone with the right joystick. Lastly, tank drive controls the left motor with the left joystick and the right motor with the right joystick. After that, we were able to begin driving with the control setting that best suited us. Our ultimate goal is to create a robot to compete in the Freeze Tag Competition.

DEVELOP:
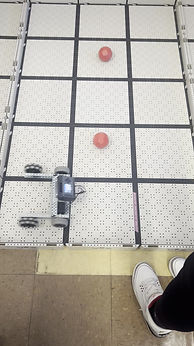
The first of two challenges we completed was the Figure Eight Challenge. In this assignment, we had to navigate our robot around two buckyballs without contacting them or the walls. We'd completed this challenge twice. We finished 11th with 28 seconds on our first attempt. For the second take, we tried out some new wheels. We ended up testing a combination of travel wheels and Omni Directional Wheels in the back.This combo made driving much easy. Travel wheels at the back provided additional grip, while directional wheels in the front made turning easier.After modifying the wheels to our liking, we completed the task in fourth place with 10.32 seconds.

The second challenge we faced was the one-on-one challenge. For this task, we learned about the bumper switch. A bumper switch is a basic mechanical mechanism that indicates whether it is pressed or not. We needed to add the bumper switch and a c-channel to the front of our robot. Then we altered the wheels to our liking. The regulations of this challenge state that the team with the most points wins. Points are awarded dependent on how many times the opposing bumper switch is pressed. After competing, my companion and I won by 7 points to 0 points.
